As with all of my Tutorials, my way is not the only way
and it is not even the best way.
It is just the way that I happen to do it,
which is always subject to change :-)
I started out using a .jpg which gives you a more realistic
looking snowfall but since this is a tutorial I decided to change
all that and I used a transparent image instead.
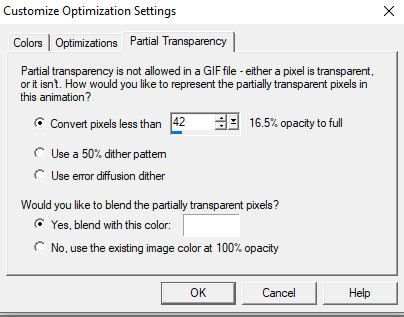
I don't recommend creating snowflakes on a
transparent background as the Optimization Wizard
can do terrible things to your beautiful creation.
But, I'm a glutton for punishment so I took the plunge.
If you want to use this picture just Right-Click and Save.

Before I go any farther, I am showing you the snowflakes
that were created on the .jpg below.

I used the same plugin settings for both the .jpg and the
Santa png with the transparent background,
but the transparent background will give you a different result
when you attempt to save it and I didn't want you to get discouraged.

The easiest way to create snowflakes is to use the VanderLee plugin.
You can download it here:
Snowflakes.zip
Place your Snowflakes plugin in the Plugin folder of your choice.
Either your My PSP Files or your Jasc or Corel plugin folder.
Open PSP and then open your image.
Open Animation Shop (AS) and make sure that your
Propogate Paste tab is active.

STEP 1
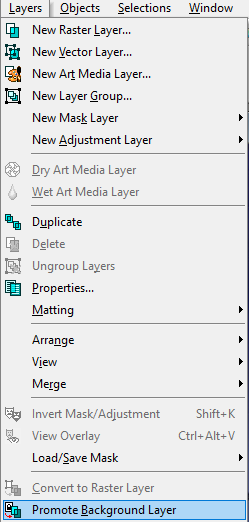
If you are using a .jpg picture go to
Layers -- Promote Background Layer
STEP 2
Select All.
Layers--- Duplicate.
Repeat.
Now you should have 3 layers.

STEP 3
Highlight the top layer which will probably say
Copy (2) of Raster 1.
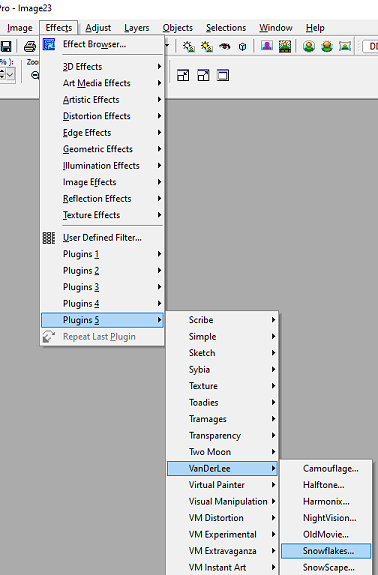
Go to Effects and find VanDerLee Snowflakes.
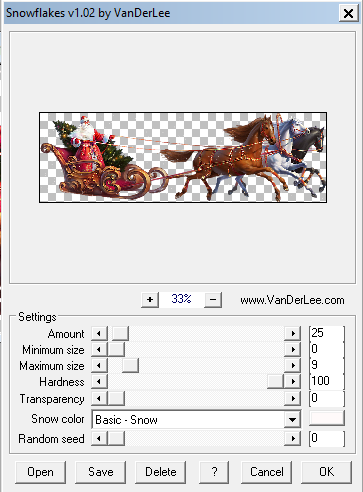
When you open your Snowflakes plugin you will need
to change the settings to your liking.
For the Amount I went with 25 because I wanted a light snowfall
not an all out blizzard :-)
I went with a maximum size of 9 here because I didn't want
ginormous snowflakes for this picture.
This is what I have now:

Highlight the middle layer which will probably say
Copy of Raster 1

Go to Effects and the Snowflakes plugin.
It should be here:

All you will need to do is change the Random seed
at the bottom. Instead of 0 I moved it to 5220.
I never pick the same number so don't be afraid
that you are doing this wrong.
Changing the random seed number just places
the snowflakes in other areas of your picture.

Now highlight the bottom layer which should
say Raster 1.
Open your Snowflakes plugin and change the
Random seed again.
This time I changed it to 8364

STEP 4
Go to Selections and Select None.
Highlight the Top Layer.
Right-Click (on the Blue Title Bar) and choose Copy.
OR go to Edit and choose Copy.

Go to AS, Right-Click and Paste as New Animation.
Go back to PSP and highlight the Middle Layer.
Right Click (on the Blue Title Bar) and choose Copy.
OR go to Edit and choose Copy.
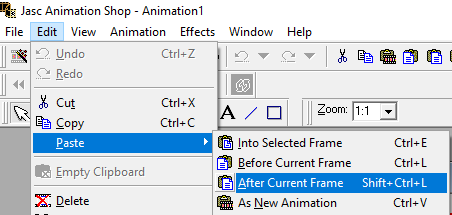
Go to AS and then Edit and Paste After Current Frame
Go back to PSP and Highlight the Bottom Layer.
Right Click (on the Blue Title Bar) and choose Copy.
OR go to Edit and choose Copy.
Go to AS and then Edit and Paste After Current Frame.
You should have 3 frames now.
Go to Edit and Select All.
To see how your animation looks
Go to your top toolbar and click on the filmstrip

The default Frame Properties is 10 so your snowflakes will be
coming down pretty fast.

To change the speed you might want to set it at 20.
Go to Animation and scroll down to Frame Properties


This might be a little better.
(They look more like bubbles than snow)
This is why I showed you the .jpg earlier.

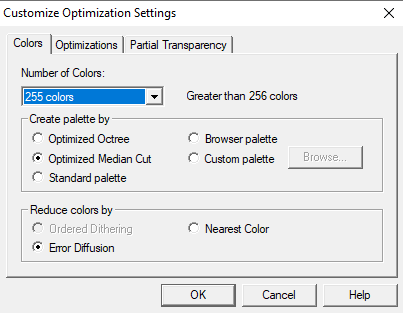
To save your animation go to the Optimizations Wizard.
(better known as The Bane of My Existence)
These settings are not set in stone.
Everyone has their own preferences when it comes
to the Optimization Wizard.

I tried the Optimized Octree because sometimes you get better
results, but not today. It destroyed parts of the image.
If you have any questions please send me an email and I will try to help you.
psp.alphagirl@gmail.com
No comments:
Post a Comment