It's been quite a while since I wrote a Tutorial so please bear
with me. I'm a bit rusty.
Changing the color of a background without distorting the texture
is relatively easy with PSP 9 and can be done by clicking on the
Adjust Tab on your top toolbar.
There you will find two options.
You can use Hue and Saturation, or Manual Color Correction.
Let's start with this beige blank. I chose beige because it's neutral.

What if you want to change it to light pink or mauve?
For the Hue and Saturation method you will need the H and S
numbers for your color.
Go to your Color Palette and find the H and S numbers for the
color you've chosen.

Here it shows the H and S numbers are both 255.
For the Hue and Saturation method you will need to click on your
Adjust Tab -->Hue and Saturation-->Colorize.

This part can be both tricky and tedious, depending on the original color of
your background.
Here is what happened to the beige background with those H and S numbers.

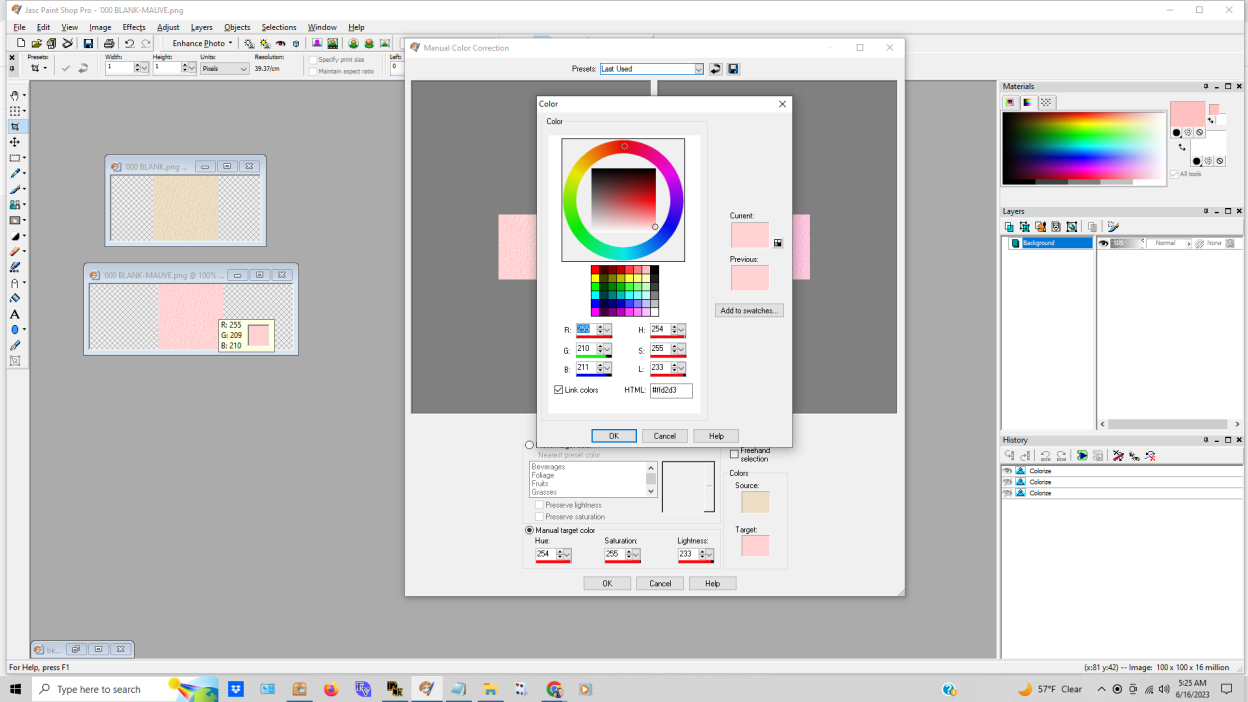
But what if you decide that an aquamarine is the look you're going for now?


Go to your Adjust Tab and choose:
Color Balance-->Manual Color Correction


No comments:
Post a Comment