Make sure you have a pattern or color handy that you want to use
and some Accents or Corners to add when you are finished.
For this tutorial I am using a Gold Pattern and also a Black Gold Pattern.
The wonderful thing about picture frames is that you can make them any size
and you can add any embellishments. Corners, accents, doodads. The list is endless.
I have a folder with a few SUPPLIES to get you started.
Picture Frame Supplies
Place these in your My Documents/My PSP Files/Patterns folder.
Step 1
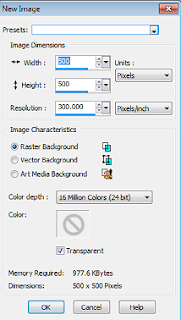
Open a New File 500x500 with a Transparent Background.
Step 2
Selections-->Select All.
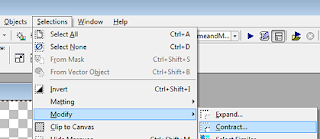
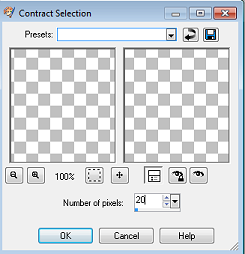
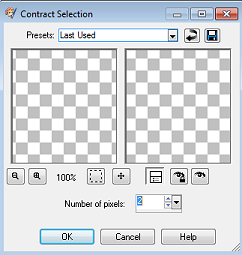
This panel will pop up. Selections-->Modify-->Contract-->20
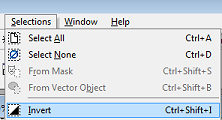
And now you want to Invert this Selection.
Selections-->Invert.
Step3
When choosing a pattern, the possibilities are endless.
Use your imagination and let it run wild, and remember if you don't like
something you can always change it, by clicking on Edit-->Undo.
Go to your Material Palette on the upper right hand side
and for your Foreground Color choose Patterns.
Place the Gold Foil Pattern in your Patterns.
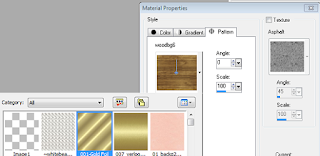
Now place the Black Gold Pattern in your Background Patterns.
Step 4
Click on your Flood Fill Tool, it looks like a little paint can.
These are the settings for your Flood Tool.

Left-Click inside the Selected Area to fill with your Pattern.
Step 5
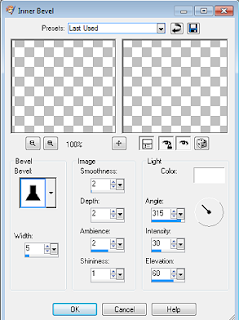
I like to add some depth to my picture frames and to do this I use the Inner Bevel Effect.
Go to Effects-->3D Effects-->Inner Bevel
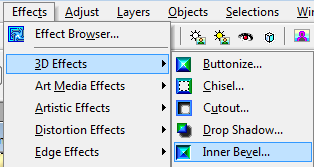
You don't have to use these settings. You can choose whatever you feel comfortable with.
Changing the width or the Inner Bevel Style will give you different effects. So have some fun.
Selections-->Select None.
Step 6
Now it is time to add a little border around your frame.
This is something I just learned so I had to use it in this tutorial.
I knew the Effect I wanted to achieve with this frame, but I wasn't sure how to get it.
And then I remembered a little trick from Diana's Greek Kisses Tutorials
where she uses the Select Selection Borders option. I tried it here and it worked.
Thank you Diana for this little gem of PSP wisdom :-)
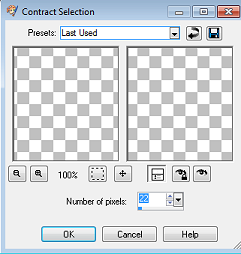
Go to Selections-->Select All.
Selections-->Modify-->Modify Contract-->22
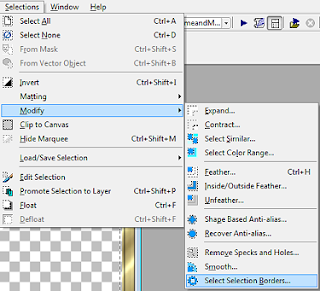
Go back to Selections and go to Modify and then scroll down to Select Selection Borders.
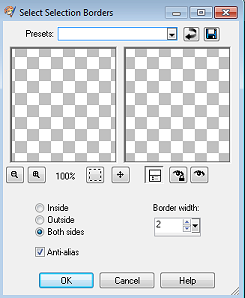
Both Sides-Checked
Anti-alias -Checked
Border Width -2
Go back to Selections-->Modify-->Expand-->1
We do this to fill the tiny spaces in each corner.
Right Click inside your selected area with the Black Gold Pattern.
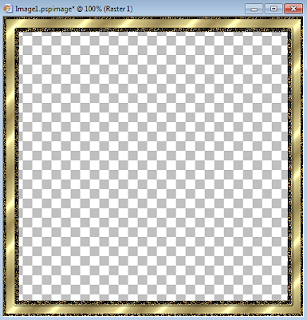
It should look like this.
Selections-->Select None.
Step 7
Now it is time to add a border to the outside of your frame.
Go to your Selections-->Select All.
Selections-->Modify-->Contract-->2
Go to Selections-->Invert.
Right Click to fill with your Black Gold Pattern.
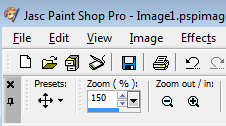
If the area is too small for you to work with, you can go up to your Zoom Tool
and take it to 150 percent or higher.
Selections-->Select None.
Step 8
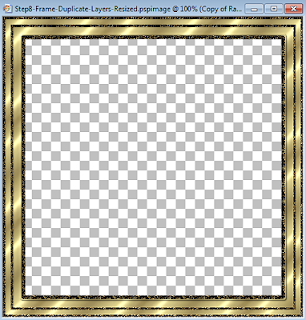
Now your frame should look like this

Go to your Top Toolbar-->Layers-->Duplicate.
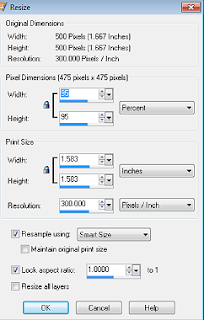
Go to Image-->Resize-->95%-->
Make sure that Resize All Layers is NOT checked.
Your frame should look like this:
Step 9
Now it's time to add some Accents or Corners.
If you don't have any of these laying around you can grab some corners that I made.
Corners for Picture Frames
Step 10
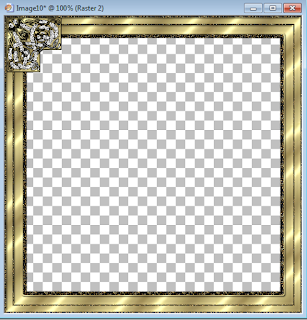
I placed the corner in the upper left hand side of the picture frame.
You can add a small drop shadow if you like.
Step 11
Now, if you want your corner on all sides all you have to do is go to
Layers-->Duplicate.
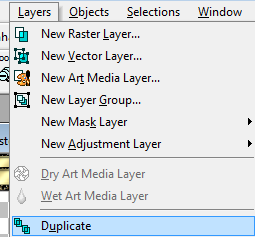
Image-->Mirror

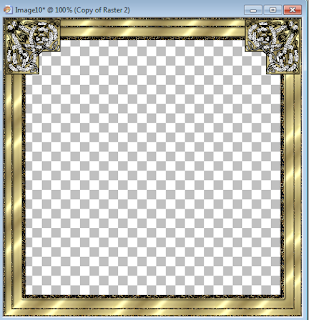
Layers -->Duplicate
Image --> Flip
Layers -- Duplicate
Image --> Mirror
Now you should have all four corners in place.
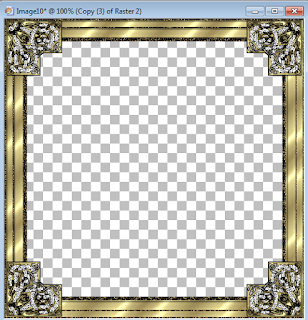
If you don't like the way your picture frame looks you can resize
your corners or color them.
ReplyDeleteThank you, very interesting tutorial. Now I'll have to make some frames lol.
I am glad that you liked it :-)
ReplyDelete