I am using my Poinsettia Alpha for this tutorial.
I created the Poinsettia myself, so the risk of copyright violations
is eliminated.
You can find my Poinsettia alpha HERE:
The Poinsettia Tutorial I used can be found
here:
~Step 1~
Open PSP and create a new file. I usually use a
600x600 workspace so that I have plenty of wiggle room.
You may need more or less depending on the size of
your alpha letters.
~Step 2~
Open the folder where your alpha is stored and drag
the first letter of your name, or the phrase that you want to
use into your workspace. I am using my
name so I will highlight the letter S1and drag it.

~Step 3~
Right click on the Blue Title Bar of your letter (It
says S1.png here) and
then Copy.

~Step 4~
Right Click on the Blue Bar of your Workspace
and Paste as New
Layer.


~Step 5~
Now highlight the second letter of your name or phrase
and drag it to your workspace.

~Step 6~
Right Click and Copy like you did on Step 3 and then Paste as New
Layer.
The hardest part about this is making sure your letters are level
and evenly spaced.
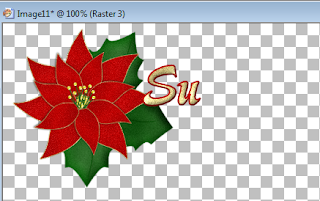


~Step 7~
I finished my name but I still have all of this unused
space that I need to crop.
Don't be afraid of your Crop Tool. You can always Edit
--->Undo if you make a mistake.
This is what your Crop Tool looks like.
This is what your Crop Tool looks like.

Start at your upper left hand corner and go down and
then across.
I hope that I am not making this sound more difficult
than it is.
You can always make your crop space
bigger or smaller by pulling on
the
square tabs.
They look like this: 


When you have your area cropped and you are sure that
you like it,
Click on the Checkmark, it will say
APPLY:

~Step 8~
With my name finished, now all I have left to do is
save it.

If you want to keep your transparent background save
your name as a png file.

Do you happen to have the supplies for the tutorial?
ReplyDeleteFrom Scrap Stuff
Delete